How to add a cookie consent banner to a Jekyll website
🏷️ tags: Jekyll
This website is created with Jekyll and I recently added Google Analytics, which uses cookies which require the consent of the visitor in the European Union. Here is a guide on how to add a cookie banner to your website.
Pick a service
You can create a banner from scratch, but it easier to use a pre-made solution. There are several services which can create a banner for you. Most of them are free or include a freemium plan, which is adequate for a personal blog, e.g.:
I picked Cookiebot, because it showed up a lot on search engines and was easy enough to set up.
Independently of your service of choice, you should end up with a script to add to the <head> of your website.
Configure Cookiebot
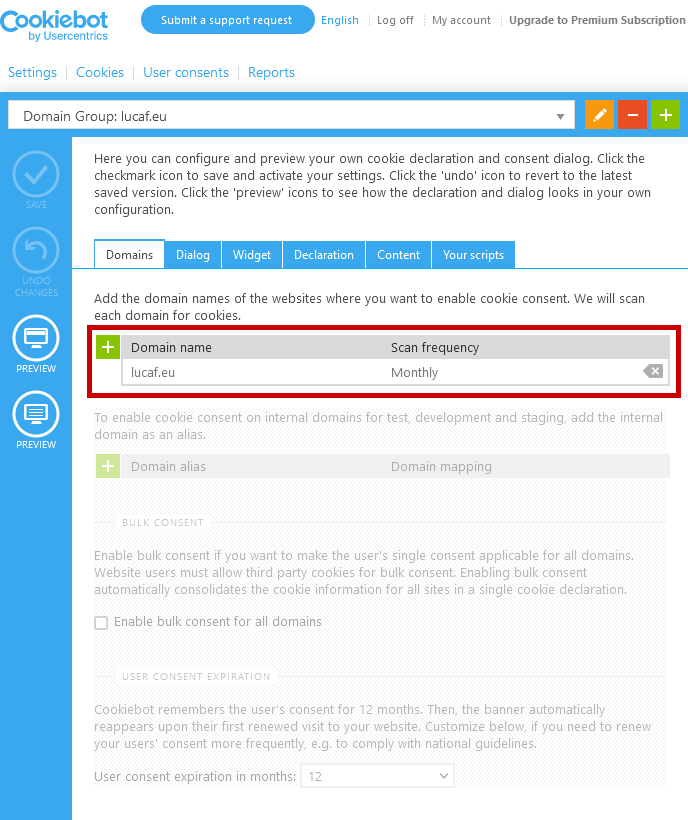
After creating an account, go to manage.cookiebot.com. Add your domain to the list.
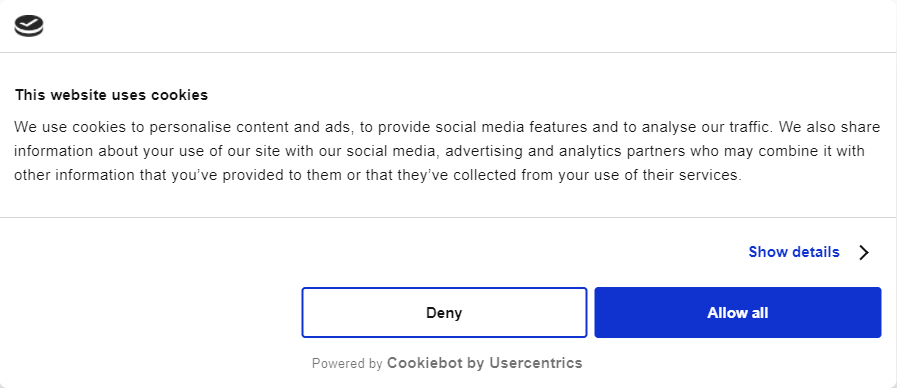
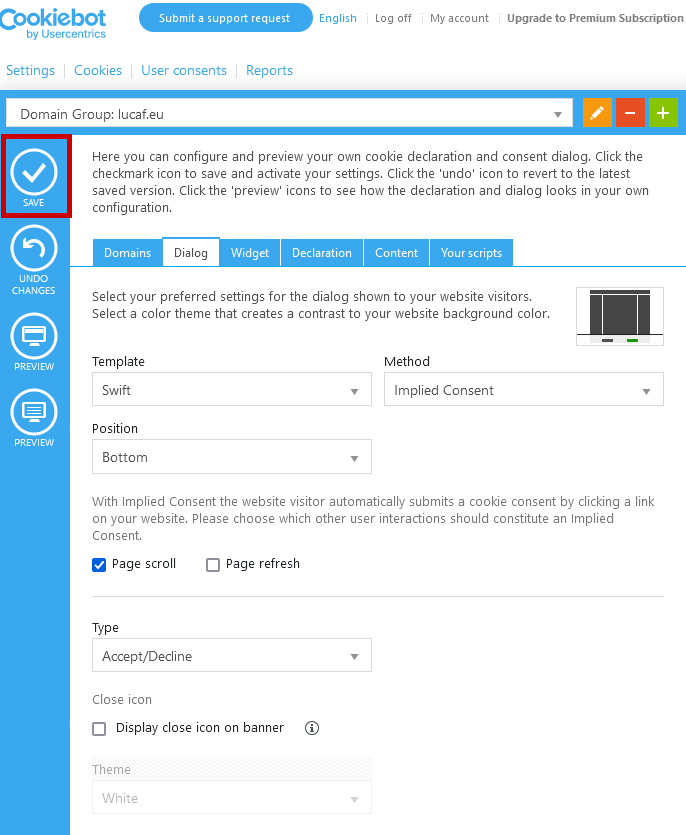
Go to Dialog to personalise the look of the dialog, save your changes afterwards. As I only have a few cookies from Google Analytics, I picked an universal Accept/Decline banner at the bottom of the page.
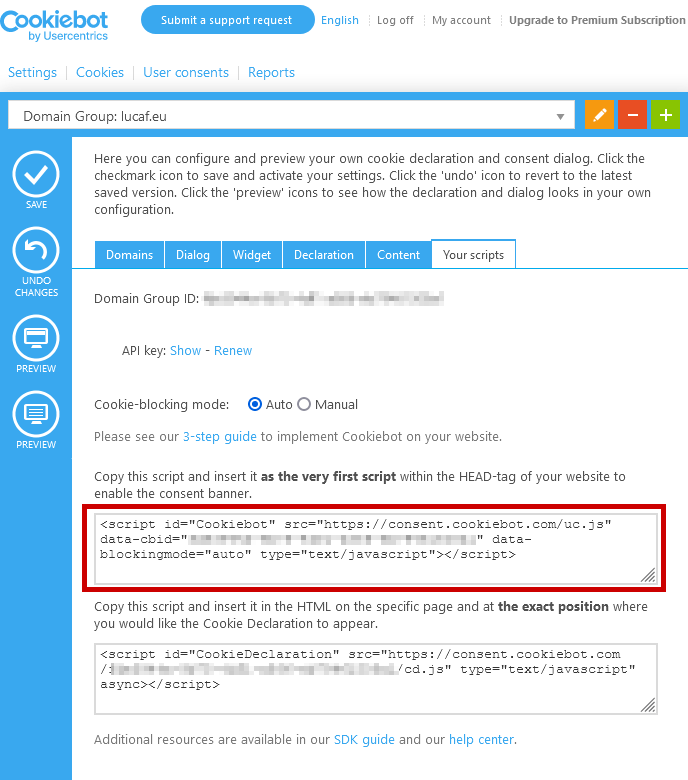
Go to Your scripts, copy the code of the first script.
Add to the head
Your head will most likely be located in the default.html layout in the _layouts directory.
Should you use different heads for different layouts, you will have to copy the script on all of them.
You should add the script at the top of the head, before any other script. This is recommended by Cookiebot to ensure that the cookies from all services are identified. Place it before any Liquid includes, as they might also include scripts.
<head>
  <meta charset="UTF-8">
  [...]

  <!-- Copy your code here -->

  {% include [...] %}

  <script> [...] </script>
  [...]

</head>
Conclusion
You won’t be able to test the banner locally with the free plan of Cookiebot. As soon as you deploy the new version of your website, the cookie banner will be shown.