How to serve Ollama on your private network with Windows 11 🦙
🏷️ tags: AI
I have a desktop PC with a GPU and wanted to use it to run large language models (LLMs) remotely on my laptop. Here is how to do it.
Configuration on the PC with the graphic card
Ollama
Download and install Ollama from ollama.com.
Open PowerShell and pull (download) the models you want to use. E.g.:
ollama pull mistral:latest
Open Ollama and toggle on the setting Expose Ollama to the network. Ollama is now serving the downloaded models to your private network.

Static IP address
Open PowerShell and run the command ipconfig.
The output should include some lines like these.
   Connection-specific DNS Suffix  . : box
   IPv4 Address. . . . . . . . . . . : 192.168.0.171
   Subnet Mask . . . . . . . . . . . : 255.255.255.0
   Default Gateway . . . . . . . . . : 192.168.0.1
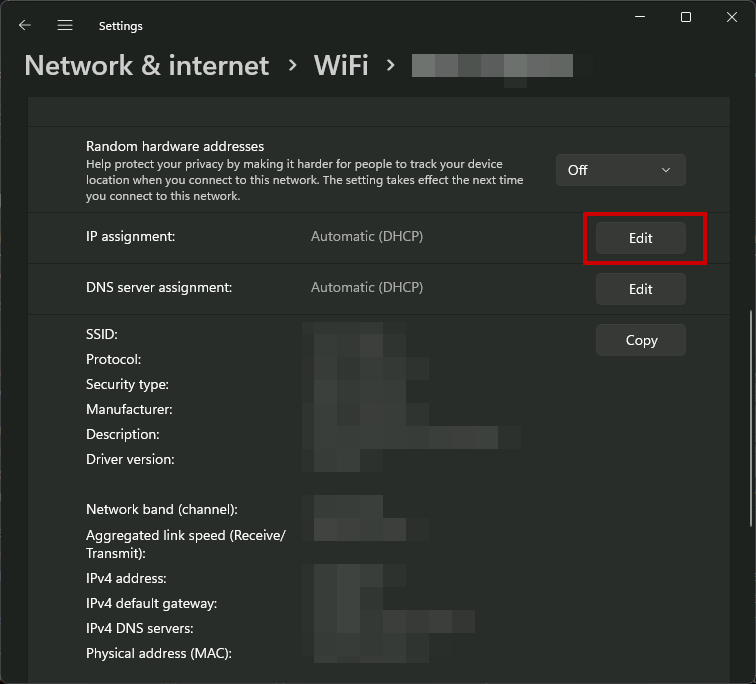
Open Settings > Network and internet.
- If you are connected over WiFi, click on WiFi > your WiFi name.
- If you are connected over ethernet, click on Ethernet
Click on Edit next to IP assignment.
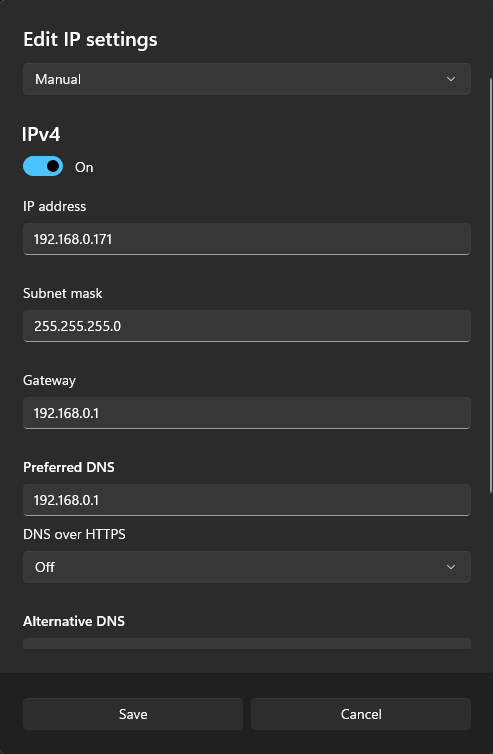
Pick Manual, toggle IPv4 on.
Enter the values you got from ipconfig; for Preferred DNS you can enter the same value as Gateway.
Leave the rest to default and click Save.
Configuration on the PC connecting to Ollama
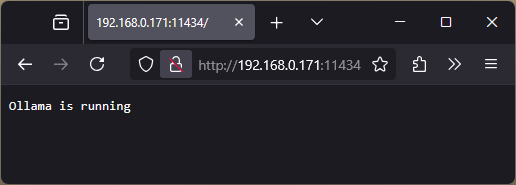
Open the browser and type the IP address of the PC serving Ollama followed by the default Ollama port 11434.
For the example above that would be 192.168.0.171:11434.
You should see the confirmation that Ollama is running properly.
You can now use the remote Ollama instance, e.g. with the Ollama API.
You just need to enter (IP-address):11434 as your API key with the IP address of the PC serving Ollama.
One way I like to use is with continue on Visual Studio Code.
